Welcome again! Here, I will explain how to set up an environment to begin data exploration in Python using JupyterLab. We will first create a virtual environment, followed by installing other needed python libraries. Open a JupyterLab notebook within the virtual environment and finally, read in a sample dataset.
Wish to skip the entire setup and get a sense of how this would look like? Click on the launch-binder button below, to get an interactive live JupyterLab notebook with all the needed python libraries pre-installed!
Note: It takes about 1-2 minutes for the notebook to be ready, since it prepares the entire environment on a server. So, hang in there!
![]()
Table of Contents
1. Create a virtual conda environment
A virtual environment helps keep dependencies (various Python libraries with a specific combination of library versions for example) required by various projects separate from each other. It basically allows you to begin working on a fresh project on a clean slate, only installing the libraries needed for the project and separate from everything else.
There are various tools available to set up virtual environments such as Pipenv, Poetry or conda. I like conda for one primary reason – Python is independent from the system. You may find this a handy reference for more, comparing the options.
Begin with this command on your Terminal if on Mac or Command Prompt for Windows, to see all virtual environments on your computer. (I have used the Linux Terminal available on my Chromebook for the demo)
> conda env list

The mention of (base) in the prompt or the * in the bottom line, indicates that I am using the base environment and that there are no other virtual environments on my computer.
Let’s create a new virtual environment, with Python 3.8 and call it env_demo.
> conda create -n env_demo python=3.8
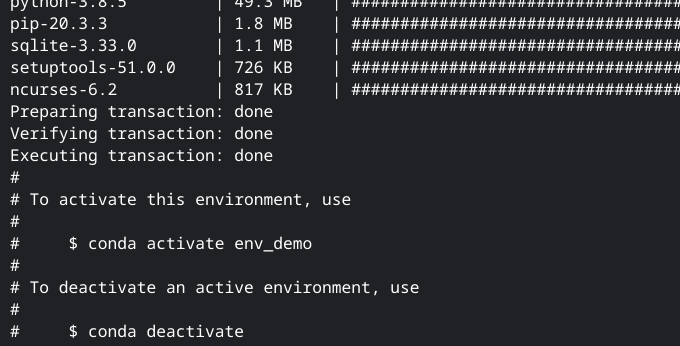
Press y and hit return/enter where it prompts for your choice. It would then install all related required packages for Python 3.8.
You will see this towards the end of it,
Let’s activate the new virtual environment we just created!
> conda activate env_demo

You will notice the prompt changes from (base) to (env_demo). But if you don’t see this, since you have a different set up, run the list command again.
> conda env list

The * is now pointing to env_demo we just created. I will talk about how you can make use of the path besides *, at the end of this section.
Finally, once you are done with the project or need to switch back to the base environment, you can run this command.
> conda deactivate

2. Install other required Python libraries
Now, let’s continue installing other Python libraries that are useful for data exploration.
Pandas is a software library written for Python for data manipulation and analysis. I need Pandas dataframes to represent structured data as rows and columns for my work, so let’s install pandas.
> pip install pandas

We will need an interface to write our code, so we install JupyterLab next.
> pip install jupyterlab
When we spin up a JupyterLab instance, it should run from the virtual environment that we created so that we have all the libraries we need. Below command will get that done.
> python -m ipykernel install --user --name env_demo

3. Spin up JupyterLab that runs on the virtual environment we created
Running this command on Terminal or Command Prompt, should open JupyterLab in your web browser.
> jupyter lab

In case you accidentally close the JupyterLab tab on the browser, look for these lines on the Terminal or Command Prompt. Copy paste everything from https:// till end of line in a new tab. Or, of course you can reopen from browser history!

Now click on the tile called env_demo under Notebook, to open a fresh JupyterLab notebook to run within the virtual environment we created –env_demo that you can find on the top right and, we are ready to code!!

4. Read in data into JupyterLab notebook
For this and few other sections I will be using a public dataset that contains Country/Mission wise OCI details from the Indian Open Government Data Platform.
[Overseas Citizenship of India (OCI) is given to Persons of Indian Origin who immigrated from India and subsequently acquired citizenship of a foreign country. It basically gives life long visa to visit India, but includes other benefits and restrictions too.]
Each block in the notebook is called a “cell”, where you can type commands or text. In addition, every cell is executable and the output displays right under it! We will familiarise more about the notebook as we progress further.
For now, let’s import pandas library within the notebook, read the oci_dataset_2013.csv file to a data frame, and display a sample from the dataset. Type the commands as in the image below and execute them either using the play button or using Shift+Enter (or Return on Mac).

The path besides the virtual environment name in the result of the conda env list command, comes handy when you need to run a python script.
For example, let’s say you have a python script called exploratory.py and the libraries that it needs are in a virtual environment called env_demo. Now, irrespective of the environment you are currently in, you can run the python script like below:

I’ve added /bin/python3 to the virtual environment path for env_demo.
Also, notice that * is pointing to the base environment, yet, exploratory.py script runs with all the needed libraries as installed in the virtual environment env_demo.
Conclusion
In summary, we saw how to create a virtual environment with a specific Python version, install any additional libraries needed, spin up a JupyterLab notebook within the same virtual environment and read a sample dataset to further explore.
